

Este artigo não está disponível na língua que selecionou. A versão em inglês foi selecionada automaticamente.
Bitget Beginner's Guide—How to Trade Futures?
[Estimated reading time: 5 mins]
This guide is designed to help new Bitget users get started with futures trading. Using USDT-M Futures as an example, we'll walk through the core steps: Transferring funds, placing orders, and monitoring your positions. Be sure to read this guide thoroughly before trading to understand key concepts, the trading process, and potential risks.
Futures trading is a derivative that can amplify returns, but it also comes with higher risks. Unlike spot trading, futures trading requires careful strategy and risk management.
How to transfer funds to your Futures account
Before you can trade futures, you'll need to transfer funds into your futures account. Since Bitget divides user assets into multiple sub-accounts (e.g., spot account, futures account), you'll need to transfer funds from your spot account to your futures account in order to start trading.
Here's how to get started:
1. Tap the Transfer button on the Assets page.
2. Choose to transfer from Spot to USDT-M Futures (or select another futures type if needed).
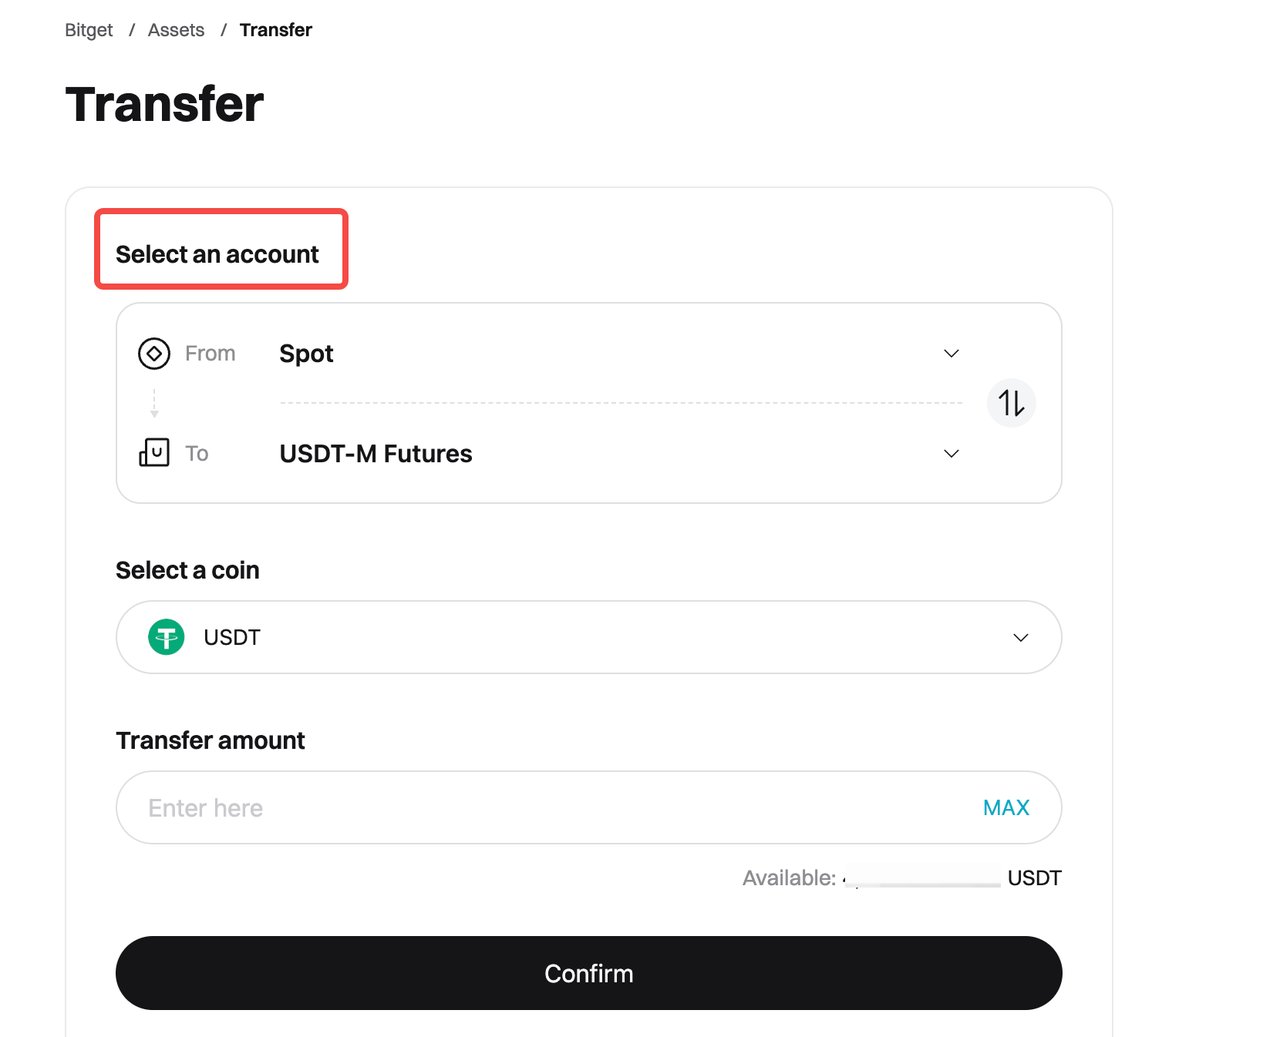
3. Enter the transfer amount and tap Confirm.
4. The funds will appear instantly in your futures account and will be available for trading.
Note: Bitget's account structure is designed to isolate risk. Always double-check that you've selected the correct account when depositing or transferring funds.
How to place orders on the Bitget app
Bitget app offers a user-friendly interface for futures trading. Here's how to place a futures order on the app (with USDT-M Futures as an example):
Step 1: Go to the futures trading page
• Open the Bitget app, tap Futures on the bottom navigation bar, and select USDT-M Futures.
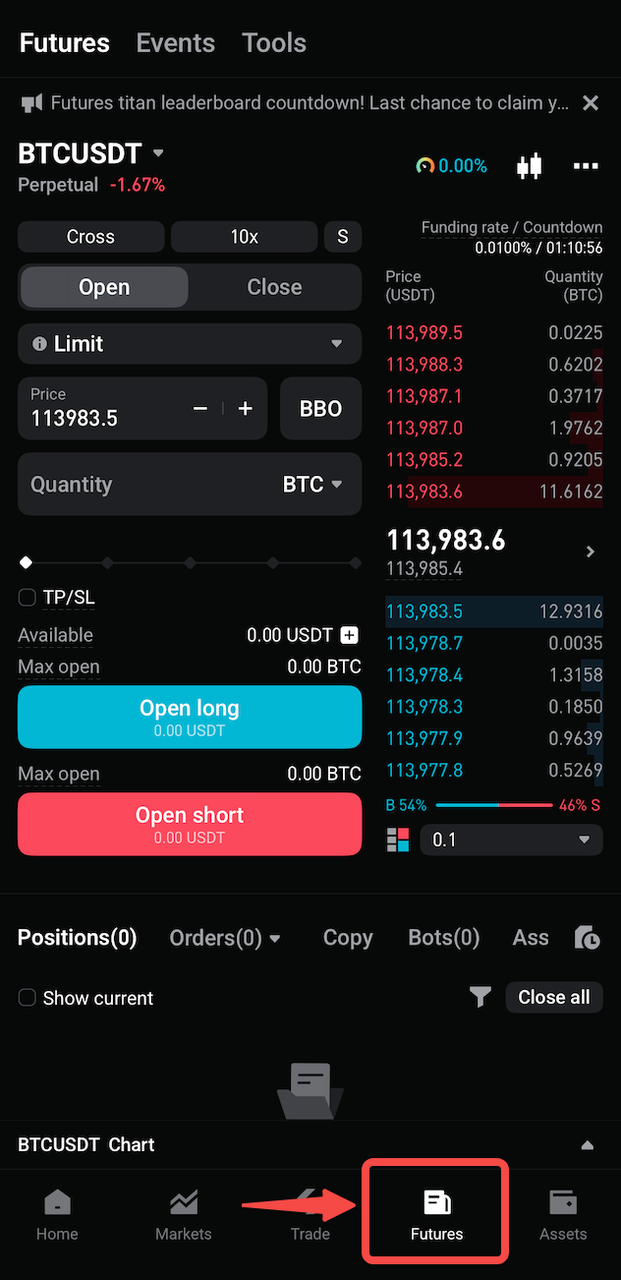
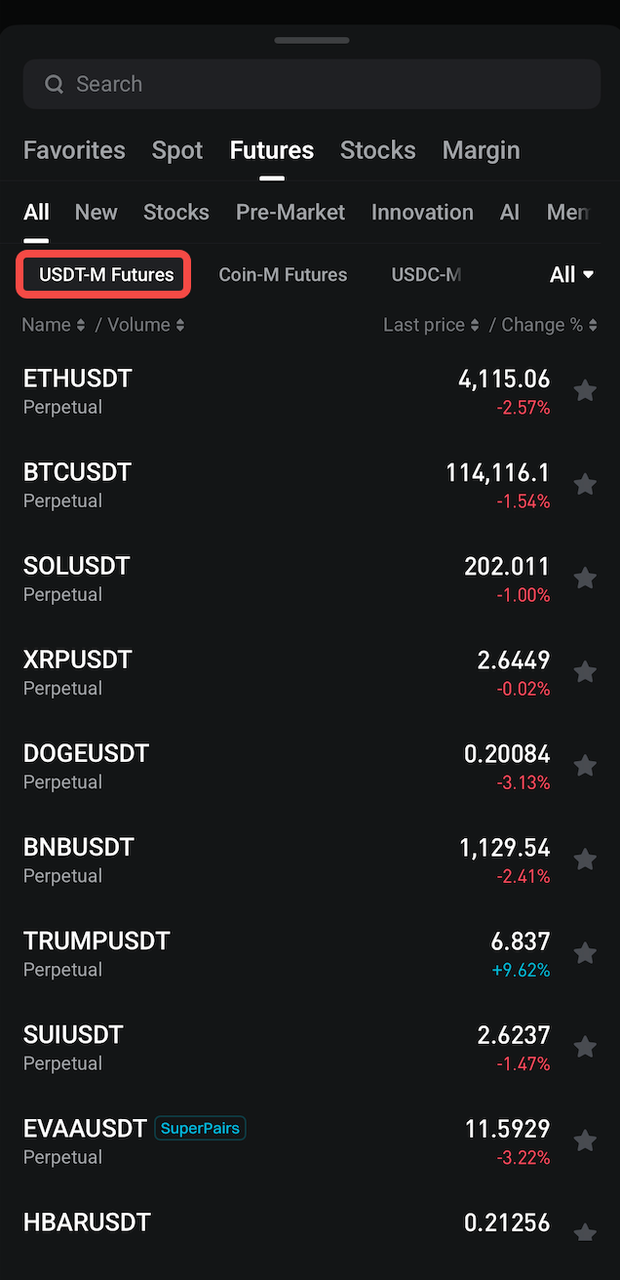
Step 2: Select a trading pair
• Select your preferred trading pair from the list (e.g., BTCUSDT).
Step 3: Adjust leverage
• Tap the Leverage option and select a suitable multiplier (e.g., 10x). Beginners are advised to use lower leverage (e.g., 2x–5x) to reduce risk.
Step 4: Select the order type
• Select Limit or Market order. A limit order lets you set a specific price, while a market order executes instantly at the current market price.
Step 5: Enter quantity and place an order.
• Enter the position size (quantity or amount), choose Open Long or Open Short, and tap Confirm to place an order.
How to place orders on the Bitget website
The Bitget website offers more advanced tools for market analysis. Here's how to place a futures order:
Step 1: Log in to the Bitget website
• Visit the Bitget website, log in to your account, and click Futures at the top of the page.
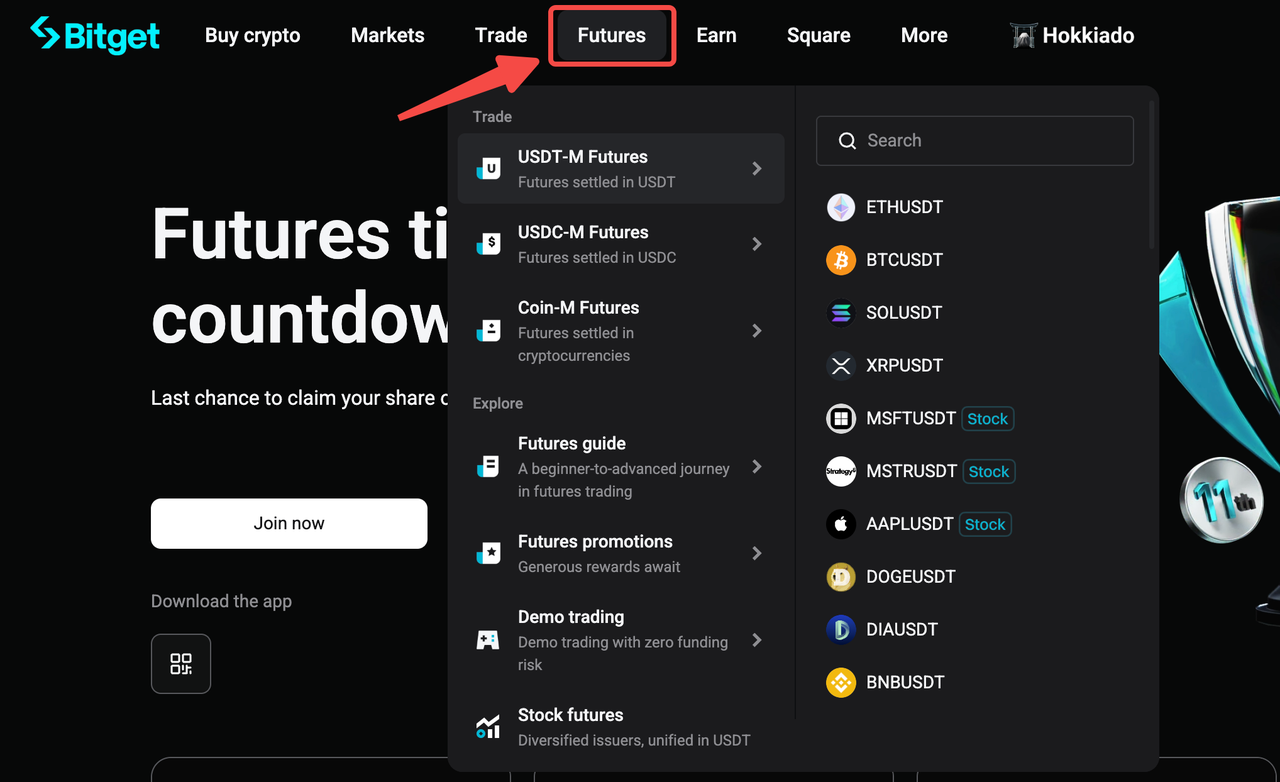
Step 2: Select a futures trading type
• Select USDT-M Futures to enter the trading page.
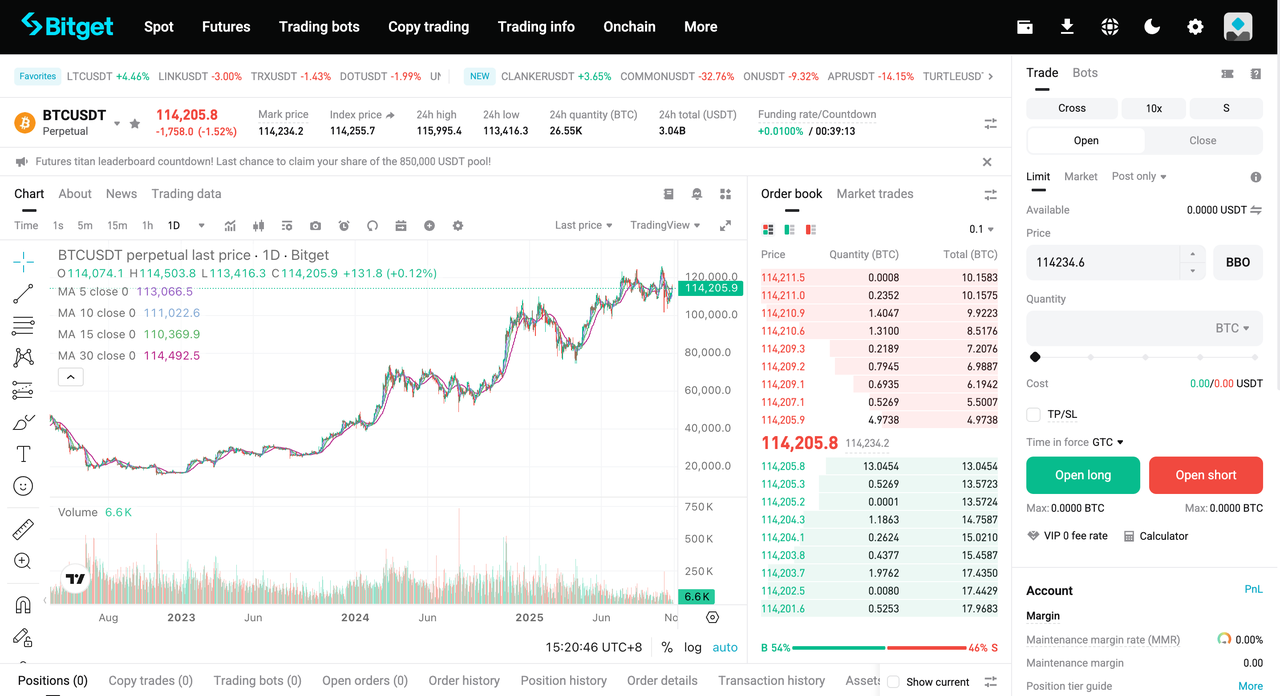
Step 3: Adjust leverage and select a trading pair
• Select your preferred trading pair (e.g., BTCUSDT) and set your desired leverage.
Step 4: Place an order
• Select your order type (e.g., limit order), enter the price and quantity, and then click Open Long or Open Short to place your order.
How to monitor orders in Bitget futures trading
Monitoring your positions is crucial after placing an order. Here's how to do it:
• On the App: Go to the Futures section at the bottom of the screen and tap Positions. View details such as PnL (Profit and Loss) and liquidation price. Tap Close to manually end a trade or adjust your Take-Profit/Stop-Loss (TP/SL) levels.
• On the Website: Your position details are shown in the Positions section at the bottom of the trading page. You can adjust your margin or set TP/SL directly from there.
• Enable notifications: Go to the Orders tab to view your order history. Use the Price Alert feature to set price alert notifications.
FAQ
1. Do I need to transfer funds before trading Futures?
Yes. You must transfer funds to your futures account before you can open a position. This ensures your margin is available for trading.
2. Which futures types can I trade on Bitget?
Bitget supports multiple futures types, including USDT-M Futures, USDC-M Futures, and Coin-M Futures. You can choose based on your preferred margin currency and trading strategy.
3. How do I place a futures order on the Bitget app?
On the Bitget app, tap Futures on the bottom navigation bar, choose a trading pair, set leverage, select an order type (Limit or Market), enter the amount, and tap Confirm to place your order.
4. How do I place a futures order on the Bitget website?
On the Bitget website, log in, click Futures at the top menu, choose a futures type, select a trading pair, set your leverage, enter price and quantity, and click Open Long or Open Short to submit the order.
5. What order types are available for futures trading?
Bitget supports limit orders and market orders in this guide.
• A limit order executes at your chosen price.
• A market order executes immediately at the current market price.
6. Can I set Take-Profit (TP) or Stop-Loss (SL) on my trades?
Yes. After opening a position, you can set TP/SL to automatically close trades when prices reach your target or loss limit.
Disclaimer and Risk Warning
All trading tutorials provided by Bitget are for educational purposes only and should not be considered financial advice. The strategies and examples shared are for illustrative purposes and may not reflect actual market conditions. Cryptocurrency trading involves significant risks, including the potential loss of your funds. Past performance does not guarantee future results. Always conduct thorough research and understand the risks involved. Bitget is not responsible for any trading decisions made by users.
Join Bitget, the World's Leading Crypto Exchange and Web3 Company
Compartilhar
